Best Tripod for HDR Bracketing in 2026 (Stable Brackets, Sharp Merges)
Quick Answer: The best tripod for HDR bracketing is one that keeps your camera perfectly still across 3–9 exposures: the Peak Design Travel Tripod for portability, the Manfrotto MT190XPRO4 for all-round stability, and a Neewer carbon fiber tripod on a budget. Prioritize load capacity above your heaviest lens, an Arca-Swiss quick-release plate, and a smooth ball head.
Why a Tripod Is Non-Negotiable for HDR Bracketing
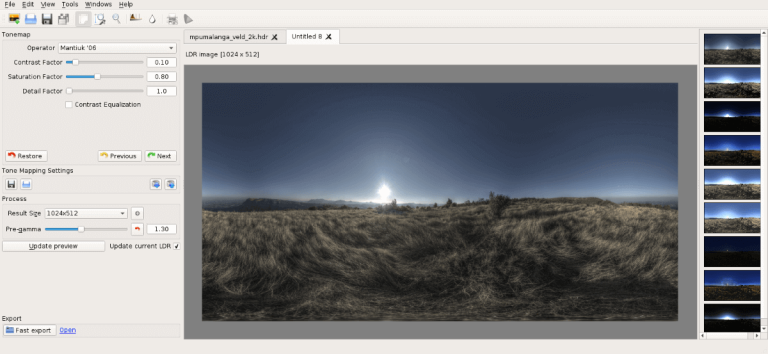
HDR photography starts before you ever open an editor: you shoot a bracketed sequence — typically 3, 5, 7, or even 9 exposures — of the exact same scene, from deep shadows to blown highlights. Luminance HDR then merges those frames into a single 32-bit HDR file and tone-maps it back into something your screen can display. Every step of that pipeline assumes one thing: the camera did not move between shots.
Modern merge tools, including Luminance HDR’s built-in anti-ghosting, are good at removing moving subjects (pedestrians, cars, swaying branches). They are not designed to fix a moving camera. Sub-pixel shifts between frames cause soft merges, fringing around high-contrast edges, and ghosting artifacts that no amount of tone mapping will hide. Handheld bracketing can work in a pinch with fast burst mode and image alignment, but for critical work — real estate interiors, landscapes at golden hour, architecture — a tripod is the single cheapest upgrade to your HDR quality.
If you’re new to the shooting side, read our exposure bracketing guide first; once your brackets are rock-solid, download Luminance HDR and merge them with our step-by-step tutorial.
What to Look for in a Bracketing Tripod
Load capacity and stability
Add up your heaviest camera body, your heaviest lens, and the head itself — then buy a tripod rated for comfortably more than that total. A good rule of thumb is 2× your actual load: a rig that weighs 3 kg deserves a tripod rated for at least 6 kg. Ratings are optimistic, and wind, long exposures, and an extended center column all eat into real-world stability. For HDR specifically, stability matters more than weight savings, because even tiny vibrations during a 9-frame bracket show up as softness in the merged file.
Head type: ball head vs. 3-way vs. panoramic
For bracketing, a ball head is the best default: one control locks everything, so you can level and recompose between brackets quickly. A 3-way pan-tilt head gives finer independent control of each axis and is popular with architecture photographers who need precise leveling. A dedicated panoramic head is overkill for HDR brackets but worth knowing about if you also shoot stitched panoramas. Whatever you choose, make sure the head locks down with zero creep — a head that slowly droops during a bracket sequence will ruin the set.
Maximum height and folded size
Your tripod should reach eye level without fully extending the center column, since a raised column is the least stable part of any tripod. If you hike to locations, folded length and weight matter: a travel tripod that fits in a carry-on is one you’ll actually bring. For studio or real-estate work near the car, weight is a feature, not a bug — heavier tripods resist wind better.
Carbon fiber vs. aluminum
Carbon fiber dampens vibrations better and weighs roughly 30% less than an equivalent aluminum tripod — meaningful on a long hike, marginal in a studio. Aluminum is cheaper and arguably more durable against knocks. For HDR bracketing specifically, carbon’s vibration damping is a genuine (if modest) advantage during long exposures. Buy carbon if you carry your tripod far; save your money if you don’t.
Quick-release plate system
Look for an Arca-Swiss compatible quick-release system. It’s the de facto standard, so L-brackets, lens plates, and replacement clamps from dozens of brands all fit. Proprietary plate systems lock you into one manufacturer’s ecosystem and become a headache the day you upgrade your head.
The 5 Best Tripods for HDR Bracketing in 2026
1. Peak Design Travel Tripod — Best for travel and hiking
The one-liner: The most packable full-size tripod ever made, with genuinely clever engineering.
Peak Design redesigned the tripod from scratch: the legs nest flush against the center column, so it packs down to roughly the diameter of a water bottle while still reaching full height. The integrated ball head is low-profile but locks solidly, and the whole thing deploys in seconds — a real advantage when golden-hour light is changing between brackets.
Pros: Exceptionally compact when folded; fast setup; solid 9 kg (20 lb) load rating; excellent build quality.
Cons: Expensive (around $380 for aluminum, more for carbon); the proprietary-feeling head design limits aftermarket options.
Best for: Landscape and travel photographers who hike to their brackets.
2. Manfrotto MT190XPRO4 — Best all-rounder
The one-liner: The classic aluminum workhorse that lives in countless photographers’ trunks.
The 190 series has been the default recommendation for over a decade for good reason: 4-section aluminum legs, a 90° center column mechanism that’s genuinely useful for low-angle and overhead brackets, and Manfrotto’s rock-solid QPL leg locks. Pair it with a decent ball head (the XPRO line is a natural match) and you have a setup that will outlast your camera bodies.
Pros: Proven durability; 7 kg load capacity; versatile 90° column; huge accessory ecosystem.
Cons: Heavier than carbon alternatives; legs-only kits need a separate head purchase.
Best for: Real estate, architecture, and general-purpose HDR work where the tripod lives near the car.
3. Manfrotto Befree Advanced — Best lightweight travel kit
The one-liner: Manfrotto’s travel line: compact, light, and ready to shoot out of the box.
The Befree series folds down small enough to strap to a daypack and comes as a complete kit with Manfrotto’s own ball head — no separate head purchase needed. The Advanced version bumps the load capacity to 8 kg and adds sturdier leg locks compared to the basic Befree. It’s the sensible middle ground between a full-size 190 and an ultralight that compromises too much.
Pros: Complete kit with head included; genuinely travel-friendly; trusted brand support.
Cons: Shorter maximum height than full-size tripods; not ideal for very heavy telephoto rigs.
Best for: Travel photographers who want a no-fuss kit that just works.
4. Vanguard Alta Pro 2+ 263AB — Best for awkward angles
The one-liner: The multi-angle center column king for low, overhead, and macro-adjacent brackets.
Vanguard’s Alta Pro line is famous for its MACC (Multi-Angle Center Column), which swings from vertical to horizontal — letting you shoot straight down, get the camera inches off the ground, or reach over obstacles. For HDR, that flexibility matters when the perfect bracket composition is at knee height or over a railing. The included ball head is serviceable, and the 7 kg load rating covers most full-frame setups.
Pros: Unique articulating center column; good value for the feature set; solid leg locks.
Cons: Bulkier folded than travel tripods; the column mechanism adds weight and complexity.
Best for: Real estate and interior photographers who constantly shoot from unusual positions.
5. Neewer Carbon Fiber Tripod — Best budget pick
The one-liner: Surprisingly capable carbon fiber for around a hundred dollars.
Neewer’s carbon fiber tripods (the 66″/168 cm class is the sweet spot) have become the default budget recommendation: real carbon legs, an included ball head with Arca-Swiss plate, and a monopod conversion feature. No, the leg locks and head refinement don’t match Manfrotto — but for HDR bracketing on a budget, it holds a mirrorless camera steady through a 7-frame bracket, which is the entire job.
Pros: Real carbon fiber at a budget price; complete kit; converts to monopod.
Cons: Less refined locks and head than premium brands; long-term durability is the open question.
Best for: Beginners and anyone who wants carbon fiber without the carbon fiber price.
Tripod Comparison Table
| Tripod | Material | Load Capacity | Folded Size | Head Included | Best For |
|---|---|---|---|---|---|
| Peak Design Travel Tripod | Aluminum / Carbon | 9 kg | ~39 cm | Yes (integrated) | Travel & hiking |
| Manfrotto MT190XPRO4 | Aluminum | 7 kg | ~59 cm | No (legs only) | All-round workhorse |
| Manfrotto Befree Advanced | Aluminum | 8 kg | ~40 cm | Yes | Lightweight travel kit |
| Vanguard Alta Pro 2+ 263AB | Aluminum | 7 kg | ~62 cm | Yes | Awkward angles |
| Neewer Carbon Fiber | Carbon fiber | ~7 kg | ~43 cm | Yes | Budget pick |
Frequently Asked Questions
Do I need a tripod for bracketing with my phone?
For casual phone HDR, no — modern phones shoot brackets in a fraction of a second and align them computationally. But if you’re exporting true bracketed DNGs from your phone to merge in Luminance HDR on desktop (see our bracketing guide), a small phone tripod noticeably improves the merge quality, especially in low light.
Ball head or 3-way pan-tilt head for HDR?
A ball head is the best default for bracketing: one knob locks everything, so leveling between bracket sets is fast. Choose a 3-way head only if you do a lot of architecture work and want independent, precise control of each axis. Either way, the critical spec is zero creep — the head must not drift during a bracket sequence.
Is carbon fiber worth the extra money?
If you hike or travel with your tripod, yes — roughly 30% less weight and better vibration damping for long exposures. If your tripod mostly goes from car trunk to shooting position, aluminum gives you the same stability for much less money. For HDR specifically, stability matters more than the leg material.
Can anti-ghosting software fix handheld brackets?
Partially. Anti-ghosting (including Luminance HDR’s built-in tool) is designed to remove moving subjects from an otherwise aligned sequence — not to realign a sequence where the camera itself moved. Handheld brackets merged with alignment can look acceptable at web sizes, but for prints or client work, a tripod is still the answer.
What about a monopod for bracketing?
A monopod helps with vertical shake but doesn’t lock the camera in all axes, so frames still shift between exposures. It’s better than handheld for single shots, but it’s not a substitute for a tripod when you’re merging 5–9 frames into one HDR image.
Disclosure: This page contains affiliate links to Amazon. If you buy through them, we may earn a commission at no extra cost to you.