How to Fix Ghosting in HDR Photos: Deghosting Guide (2026)
What HDR Ghosting Looks Like
Ghosting is one of the most common HDR merging problems, and once you see it, you can’t unsee it. It shows up as semi-transparent duplicates of anything that moved while you were shooting your bracketed exposures:
- People walking through the frame — faint, see-through figures in plazas and streets
- Cars and traffic — smeared or doubled vehicles on roads
- Tree leaves and branches — blurry, doubled foliage on windy days
- Water and waves — odd texture where the water surface changed between shots
- Clouds — soft double-edges on fast-moving cloud banks
The cause is simple physics: your HDR merge assumes every pixel represents the same point in the scene across all exposures. When something moves between shots, the merger blends two different things into one pixel, and you get a ghost. The longer your bracketing sequence takes, the more likely ghosts appear.
Prevent Ghosts Before You Shoot
Deghosting software can fix a lot, but the cleanest ghost is the one that never happens. A few habits go a long way:
- Use a tripod. It doesn’t stop subjects from moving, but it eliminates camera movement, which makes automatic alignment — and therefore deghosting — far more reliable. See our tripod guide for HDR bracketing.
- Shoot the bracket as fast as your camera allows. Use continuous burst mode with auto exposure bracketing (AEB) so the whole sequence finishes in a second or two. Our exposure bracketing guide covers AEB setup.
- Time your shots. In busy scenes, wait for a gap in foot traffic or shoot early in the morning.
- Lock everything down. Fixed ISO, fixed white balance, fixed focus — fewer variables mean cleaner merges.
How to Remove Ghosting in Luminance HDR (Step by Step)
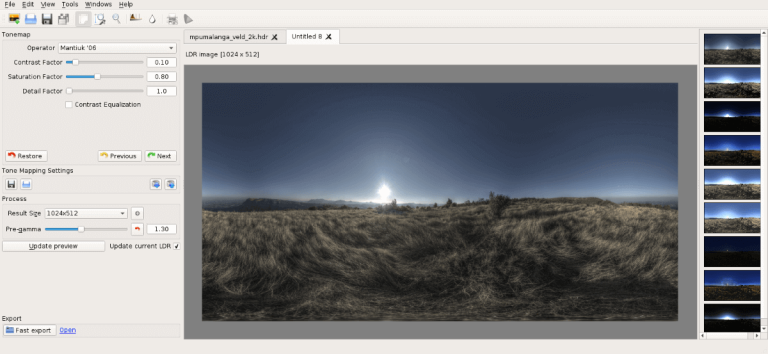
Luminance HDR has built-in anti-ghosting in the HDR Wizard. Here’s how to use it:
Step 1: Load your brackets in the HDR Wizard
Open Luminance HDR, start a new HDR from the File menu, and load your bracketed exposures. If you shot handheld, let the wizard run auto-alignment first (it uses Hugin’s align_image_stack under the hood). Alignment happens before deghosting, and good alignment is half the battle.
Step 2: Enable auto anti-ghosting
In the HDR Wizard dialog, check the anti-ghosting option. The automatic mode compares the exposures, detects pixels that changed between shots, and favors the reference exposure in those areas. For most scenes — a few pedestrians, rustling leaves — this is enough.
Step 3: Choose the right reference exposure
The reference is the exposure the merger trusts when it finds motion. As a rule of thumb, use the middle (0 EV) exposure: it’s usually the best-exposed overall, so ghosted regions filled from it look the most natural. Only switch to a darker or brighter reference if the moving subject sits in a very dark or very bright part of the frame.
Step 4: Go manual for stubborn ghosts
If auto mode leaves visible ghosts, open the advanced options in the HDR Wizard and try manual anti-ghosting: you draw a mask over the affected area on each image of the stack, telling the merger exactly which regions to take from the reference. It’s slower, but it’s precise — ideal when one person walked through an otherwise perfect interior shot.
Step 5: Check the merged result before tone mapping
Deghosting happens at merge time, not during tone mapping. Zoom into the problem areas on the 32-bit preview before you tone map. If ghosts are still visible, go back and adjust — no tone mapping operator can fix a ghosted merge.
Anti-Ghosting Settings Compared
| Setting | What it does | Best for | Trade-off |
|---|---|---|---|
| Off | No ghost detection; straight merge | Static scenes, tripod, no movement | Any motion becomes a ghost |
| Auto (low) | Light ghost suppression | Slight leaf movement, distant traffic | May miss subtle ghosts |
| Auto (high) | Aggressive ghost suppression | Busy streets, people in frame | Can create slightly soft patches in ghosted areas |
| Manual mask | You paint exactly which areas to fix | One or two stubborn ghosts in a key area | Time-consuming on large scenes |
| Reference choice | Which exposure fills ghosted regions | Middle (0 EV) for most scenes | Wrong reference can look mismatched in tone |
When Deghosting Can’t Save the Shot (Honest Limits)
Luminance HDR’s anti-ghosting is genuinely useful, but it has limits worth knowing upfront:
- Large, fast motion across the frame — a car crossing the entire scene, or someone walking close to the camera — often can’t be cleanly reconstructed. The reference exposure simply doesn’t contain the missing background.
- Water and waves rarely deghost perfectly; the “ghost” is the whole surface. Sometimes the best fix is embracing a long-exposure look instead.
- Heavy wind in foliage can defeat auto mode; manual masks help, but at some point reshooting on a calmer day wins.
If a ghost survives everything, your options are: export two versions (one deghosted, one not) and blend them manually in GIMP or Photoshop, clone-stamp the ghost out of the final image, or reshoot. There’s no shame in the reshoot — even professionals bracket a scene twice when it’s windy.
New to the whole workflow? Start with our quick-start guide to see where deghosting fits into the merge process.
Frequently Asked Questions
Why is anti-ghosting grayed out in Luminance HDR?
Anti-ghosting is part of the HDR merge step, so it’s only available in the HDR Wizard when creating a new HDR from multiple exposures — not when tone mapping a single already-merged file. If you’re working from one 32-bit image, there’s nothing to deghost against.
Does deghosting work on handheld brackets?
Yes, as long as auto-alignment succeeds first. Handheld brackets align well when there’s enough overlap and the movement between shots is modest. If alignment fails (very shaky hands, large parallax), fix the alignment before expecting deghosting to work — deghosting can’t fix misaligned images.
Can I remove ghosts after the HDR is already merged?
Not with deghosting — that only works during the merge, when the software can compare the individual exposures. After merging, your only tools are retouching (clone stamp, healing brush) in an image editor. If ghosts bother you, re-merge with anti-ghosting enabled.
Does anti-ghosting slow down merging?
Somewhat. Ghost detection adds computation on top of the merge, and manual masking adds your own time. For typical 3–5 exposure brackets on a modern computer, auto mode adds seconds, not minutes. Large high-resolution stacks take longer — that’s normal.
Why do I still see faint ghosts after deghosting?
Usually one of three reasons: the motion was too large for the reference exposure to cover, the wrong reference was chosen, or alignment was slightly off. Try a different reference exposure first, then manual masking on the specific area. If the subject moved through most of the frame, reshooting is the honest answer.
Luminance HDR is free and open source (GPLv2).